To aid in navigation, there are Commands available for the
Map Container in Workflows that allow
users to switch between previously visited Maps.
These Workflow commands function based on the navigation history, so depending on
which order the Maps were visited, those entries will be placed in a queue and be
referenced based on the order they were accessed. This history will be cleared when
the currently logged in user changes or if Runtime closes.
-
In Project Explorer double-click to open
Display layout.
-
Drag and drop a Button from the
Toolbox grid to the location on the
Display layout where you want to place it. Rename it
to indicate its purpose. Then click Save.
-
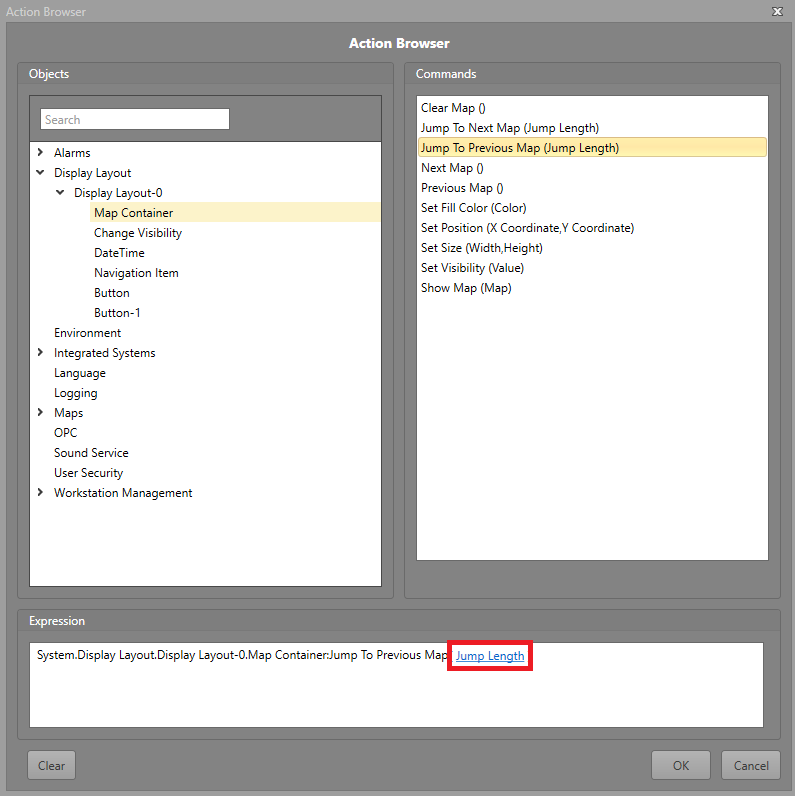
Double-click on the button to open the Action
Browser.
-
Expand Display Layout options, then expand the specified
Display Layout in the project, and click on
Map Container.
-
Select the navigation command you wish to implement out of these options:
- Jump to Next Map — Displays the next Map it will
jump to in the navigation history, according to the Jump
Length number provided.
- Jump to Previous Map — Displays the previous Map
it will jump to in the navigation history, according to the
Jump Length number provided.
- Next Map — Displays the Next Map in the
navigation history.
- Previous Map — Displays the Previous Map in the
navigation history.
-
If selecting Jump to Previous Map or Jump to
Next Map input the Jump Length number or
how many Maps it should skip in the history.
-
Click OK. The button will now navigate to other Maps
based on the navigation history.
Note: The navigation commands can be especially useful when used in Workflows. Specifically, when
used in conjunction with the Timer block to
automatically display Maps from the navigation history. Additionally, these
commands are also useful when creating a button to navigate off a helper
page, like a Legend or a Settings page.