Advanced Navigation Layout Examples

Below are examples of a simple and complex navigation layout. These show the different ways you can configure your navigation schemes for Workstations.

Simple Example

In this example, we will have a single building with a couple areas, and two Workstations. There is a front desk and back room. We will make the Front Desk Map available to both Workstations. However, the Back Room Map will only be available from one Workstation located in the back.

  1. Select the Navigation Item in your Display Layout. In the Properties grid, click the ellipsis (...) button next to Button Schemes Configuration. This opens the Navigation Wizard.
  2. Click Advanced.
  3. In the Navigation Profiles pane, click New.
  4. Select the back room Workstation to setup its navigation and click Next.
    Note: The front desk will not require it if it can only go to one Map. We can configure the front desk's Startup Map instead.
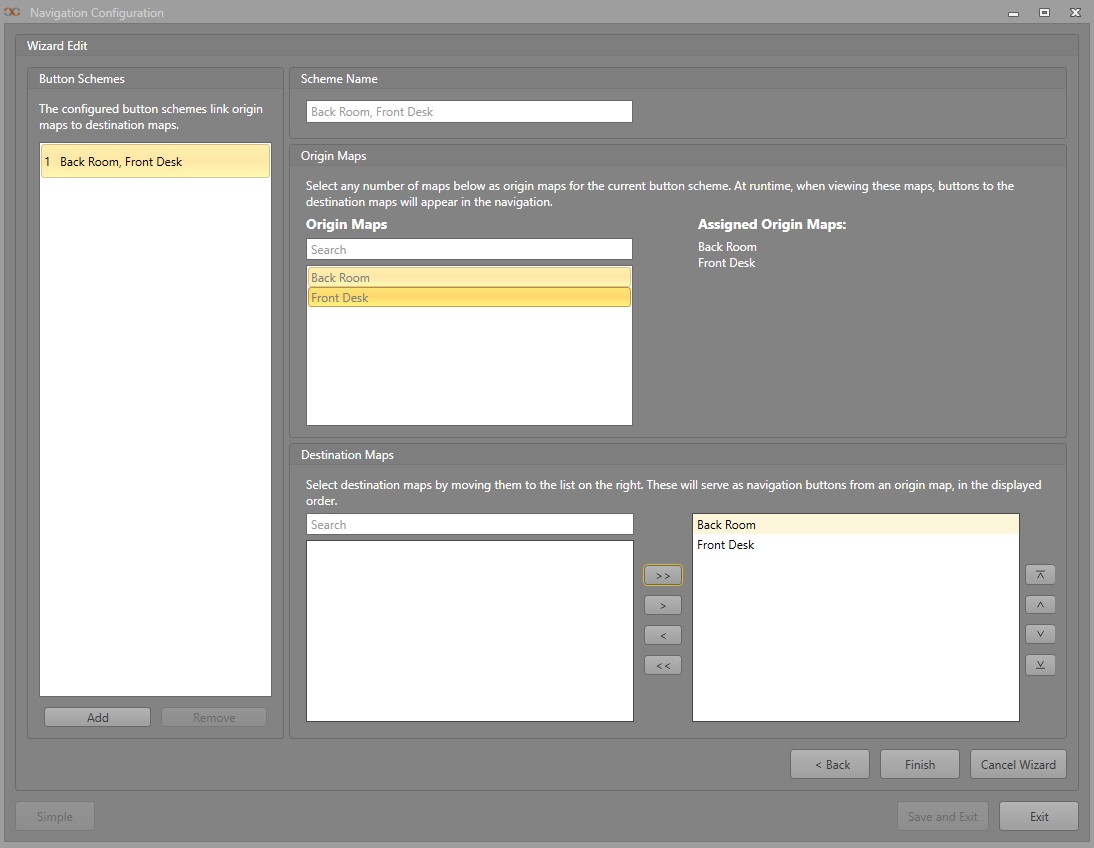
  5. Select both the back room and front desk as Origin Maps and Destination Maps. Runtime will show buttons for both Maps when navigating between them.
    Note: For best practice, each Map should be assigned an Origin Map. If a Workstation uses a Navigation Profile that restricts access to certain Maps, there should still be a way to return to the desired Maps if the operator accidentally navigates away. For instance, assets outside the Advanced Navigation scheme in Alarm Postings could appear on the Alarm Grid, leading the operator to undesired Maps when clicked.
  6. Click Next, Finish then Save and Exit.

Complex Example

In this example, we will have a large site with multiple buildings, floors on each building, and multiple Workstations. We want the operator to be able to navigate between buildings and floors on site, while not having to view all possible navigation options at once. We can simplify the navigation process.

In this example, we have three buildings on site. We want the Workstations to either be able to view all Maps for the site, or just the floors in their building.

View One Building

First, we will configure a set of Workstations to only be able to see their building.

  1. Select the Navigation Item in your Display Layout. In the Properties grid, click the ellipsis (...) button next to Button Schemes Configuration. This opens the Navigation Wizard.
  2. Click Advanced.
  3. In the Navigation Profiles pane, click New.
  4. We will select the Workstations located in the first building, then click Next.
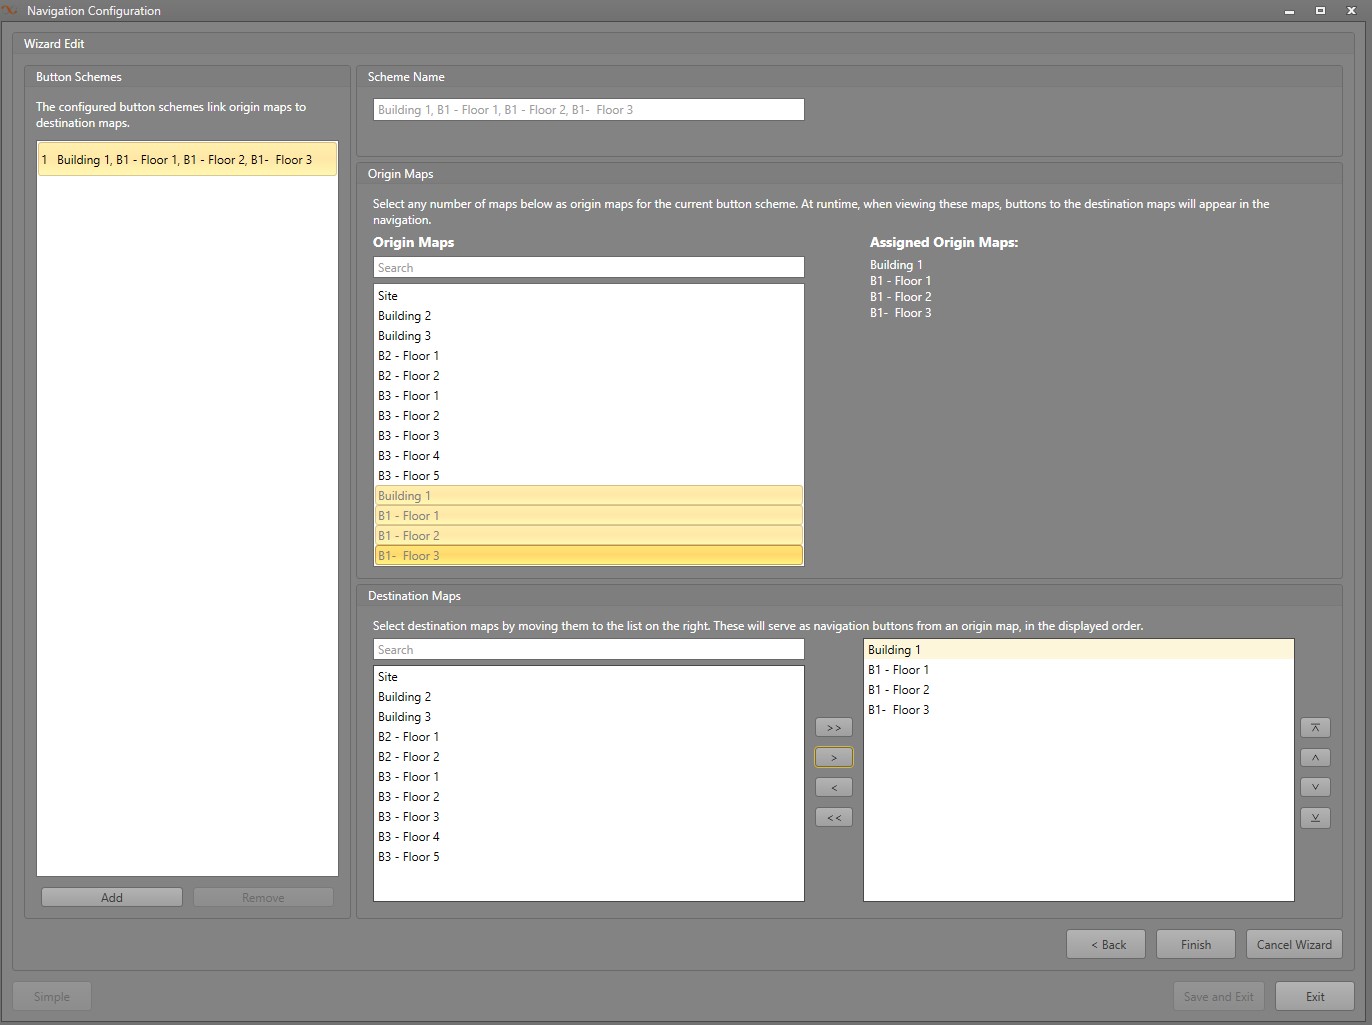
  5. We can set the building and its floors as the Origin Maps and the Destination Maps. This will have Runtime display buttons for each floor.
  6. Click Next, then Finish.

View All Buildings

Next, we will setup the view to allow Workstations to navigate to all areas. This example will show how to do setup navigation for Building 3. The same process will have to be done for the other buildings in the facility.
  1. In the Navigation Profiles page, click New.
  2. We will select the Workstations located in the second and third buildings, then click Next.
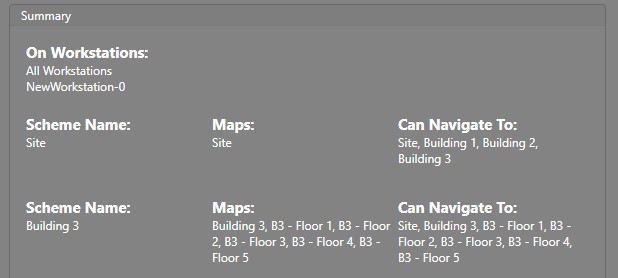
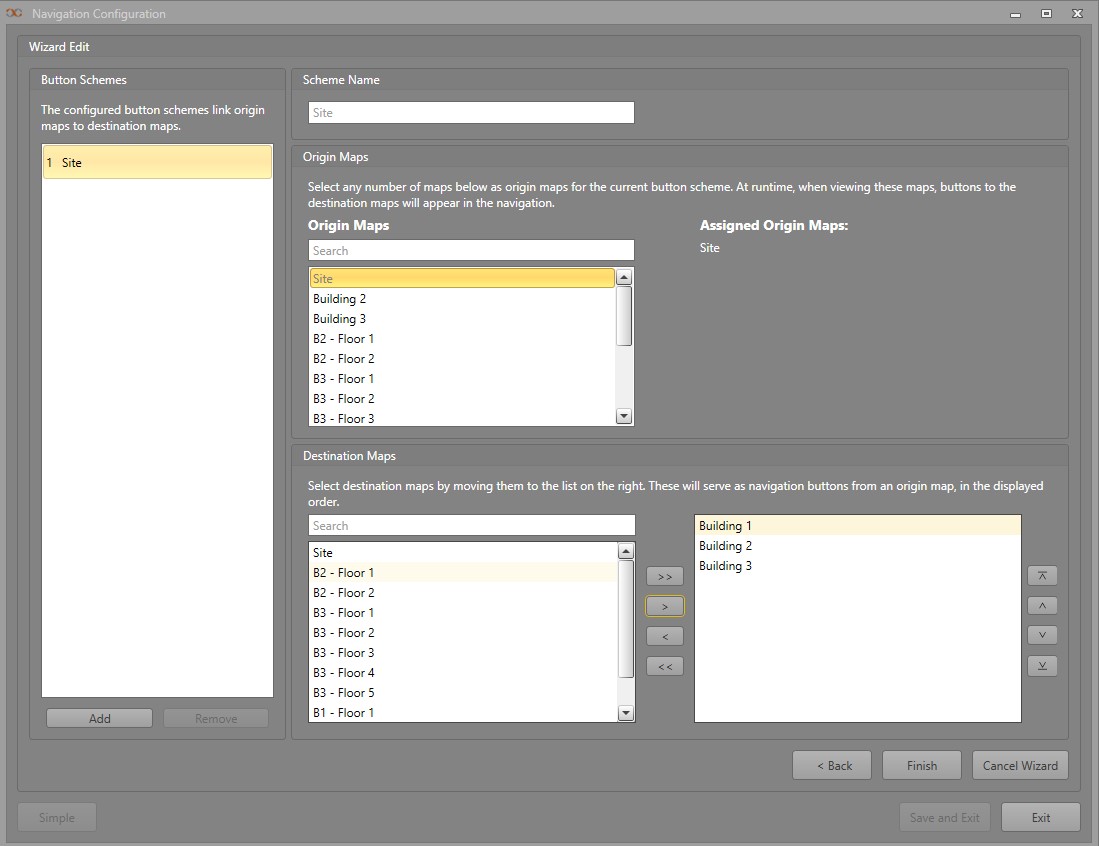
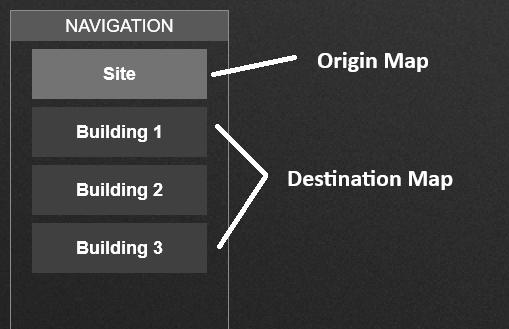
  3. For the first Button Scheme, we will select our Site Map as the Origin Map. The Destination Maps will be set to the buildings. This will make Runtime display buttons for each building when viewing the Site Map.

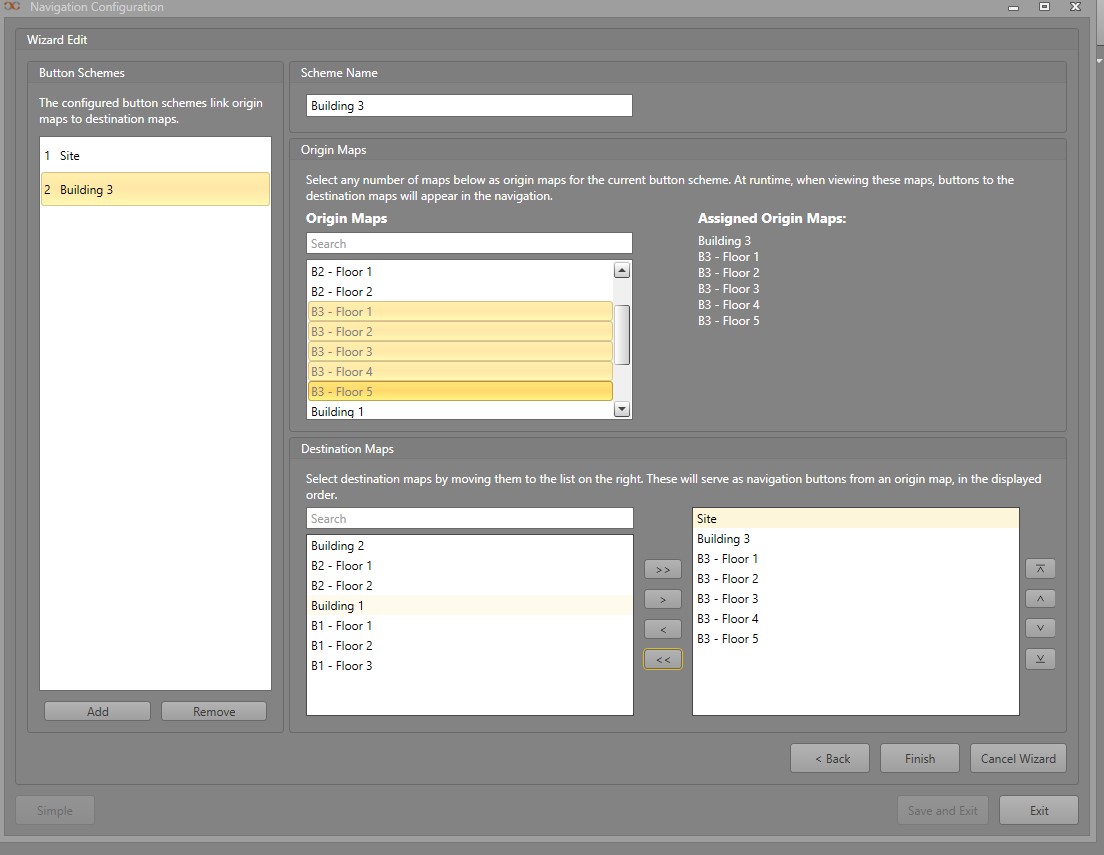
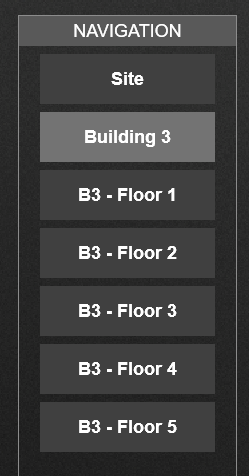
  4. For each building, we will create a new Button Scheme by clicking Add. The building and each floor will be set as the Origin Map. The Site Map, Building 3 Map, and each Floor Map for that building will be added as Destination Maps. Runtime will show buttons for each floor and to go back to the site view when looking at a building's Map.

  5. Click Finish, then Save and Exit.
This will allow the operator to go from the Site Map, to the individual buildings, then to the floors. They can then navigate back up from the floors to the building, then back to the site again. This simplifies navigation as they do not need to view all floors for all buildings on site at once. Instead, they can move between areas on site more easily.