
Create a Background
Before you can load a background image into Designer, it must first be created. This tutorial uses Inkscape to draw the background.
Before you start drawing your background, you will need:
- Inkscape installed
- Knowledge of how large the Map Container will be
- Floor plans of the area you are drawing
Tip: Do not import images directly from PDF
For each trace image used, we will be creating four layers:
- Trace Layer — The image we are tracing
- Border Layer — The outside wall for the area traced
- Traced Layer — Interior rooms
- Traced Lines Layer — Any lines that are not part of one of the above layers
To start creating your background, follow the below steps.
-
Import and layer the trace images to ensure they line up for proper
scaling.
-
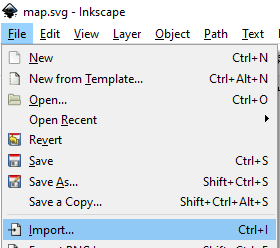
Click and select the image to import.
-
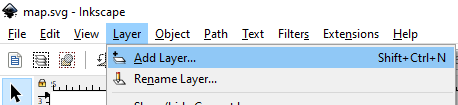
If you are adding multiple trace images, add a new layer for each
by clicking .
-
Click and select the image to import.
-
Create the border layer.
-
Click .
-
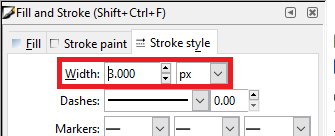
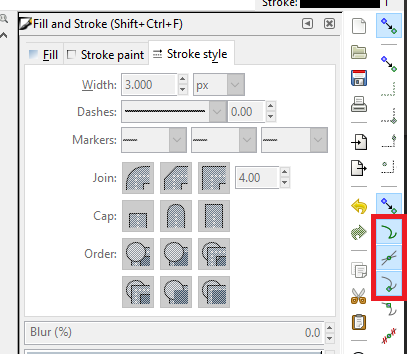
Press Shift+Ctrl+F, then go to the Stroke Style tab.
Set stroke style to three pixels.
-
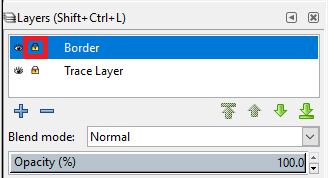
Lock the border layer by clicking the lock icon.
-
Click .
-
Create the traced layer.
-
Click .
-
Enable Snap to Paths,
Snap to Path Intersections,
and Snap to Cusp Nodes.
-
Click .
-
Export the image.
-
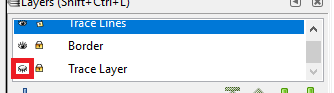
Hide the trace layer by clicking they eye icon.
-
Hide the trace layer by clicking they eye icon.
Once you have created your image, it must be added to your Map.