Create a New Project
Before you can start adding items in Designer, you must first create your project.
-
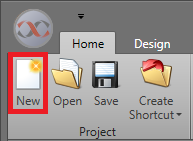
In the Home tab, click New.

-
Fill in the below fields. Click Next.
Project Name The Name for the Project. Location Where the project file will be saved to. Add to Version Control If you have Version Control enabled, you can optionally check Add to Version Control. -
If you would like to Add Workstations, click the
Add button and fill the below fields. You can change these settings later. Click
Next.
Name The Name of the Workstation. Host Address The IP Address or Host name for the Workstation. -
If you would like to add your Display
Layouts now, select one of the below presets.
Enter in its Name, Background Color, Width, and
Height. These values can be changed later. To see
what one of the presets will look like, select it and click
Preview. When complete, click
Next.
Option Description Blank Contains only a Map Container. System Control Contains: - Map Title
- Map Container
- Date
- Time
- Function Panel
- Alarm Grid
- Navigation Item
CCTV Contains: - Buttons
- Video Viewers
- Date/Time Display
-
If you would like to add Maps at this time, fill in the
below fields. This can be changed at a later time. When complete, click
Next.
Title The text which will be displayed for this Map in a Map Title item. Navigation Caption The text which will be displayed for this Map on the button within a Navigation Item. Background The image for the Map's Background. -
If you want to add your Integrated Systems now, click
Add. Fill in the below fields. If you want to configure this
as soon as project creation is complete, check Configure on Finish.
Name The Name for the system. Type Select the integrated system from this drop-down. - Click Finish to create the project.
Once you have created your project, you can start configuring areas of it such as the Integrated Systems, Display Layouts, and Maps.
