
Assign PLC Doors to an Interlock
A door interlock system links two or more doors electronically, ensuring that all doors in the group remain locked until all doors in the group are closed. Within Designer, it is possible to associate the PLC Devices Custom Assets with an Interlock Asset. However, this association is purely visual, with no logical association to the door assets. This feature can help users visualize the logic within the interlock system.
The interlock asset makes a few assumptions about the PLC:
- The PLC has internal interlock logic that prevents doors from being unlocked even when an unlock command is sent to them
- The PLC provides the state of the interlock as a separate data word that can be read and represented as an asset
- A specific data word can be written to the PLC to override the interlock and successfully unlock the doors
To assign doors to an interlock:
-
Right-click on the interlock asset and select Assign Doors to this
Interlock from the menu.
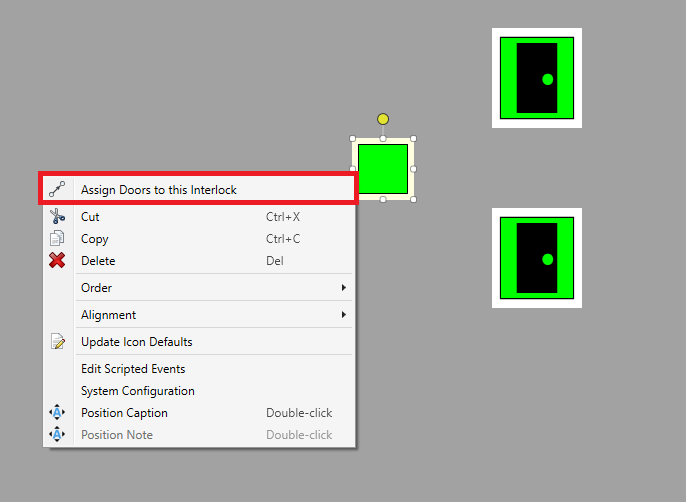 Note: The interlock Assign Doors to this Interlock option is only accessible once a door asset has been placed on the Map.
 -
Select the door assets that will be assigned to the interlock asset.
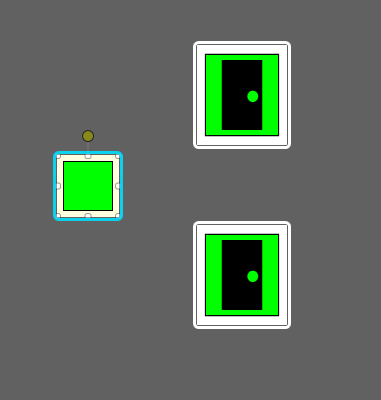
-
Double-click on the line that you would like to edit and drag it to the desired
spot. Right-click to exit the editor.

The selected doors will now be assigned to the interlock asset and can be used to visualize the logic within the interlock system. Below is an example of how it will appear in Runtime:
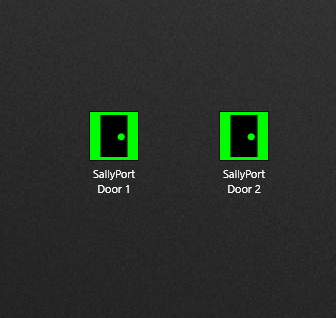
- Door 1 is unlocked, the interlock becomes visible.
- The operator tries to unlock Door 2, the unlock is ignored due to the interlock.
- The operator overrides the interlock, the interlock turns red to indicate it is overridden.
- The operator tries to unlock Door 2, the unlock is successful.
- Door 1 and Door 2 close and the interlock is no longer visible.