Configure Associated Assets for PLC Devices
For custom assets in the IPFusion PLC Devices integrated system, you can create asset associations. Associations allow PLC assets to be linked with assets from other systems; granting interconnected actions between the two entities. For example, if you associated in and out readers with a custom asset from another access control system, you could send commands to enable or disable the readers directly from the IPFusion PLC Devices asset.
| Asset | Company |
|---|---|
| Camera | Avigilon Control Center |
| Bosch VMS | |
| ExacqVision | |
| Genetec Security Center | |
| Milestone XProtect | |
| ONVIF Video | |
| Ubiquiti UniFi | |
| Intercom | Harding DXL |
| Interlock | IPFusion PLC Devices |
| Lighting | Acuity nLight |
| Cooper Fifth Light | |
| Douglas Lighting Dialog | |
| ILC LightLEEDer | |
| Reader | Genetec Security Center |
| Kantech EntraPass | |
| OnGuard | |
| Genetec Security Center |
Add Associations to the Asset Type
Asset associations must first be added to an asset type in order for assets to be associated with individual custom PLC Devices assets.
To add association types to an asset type:
-
Select the Asset Category for this
association.
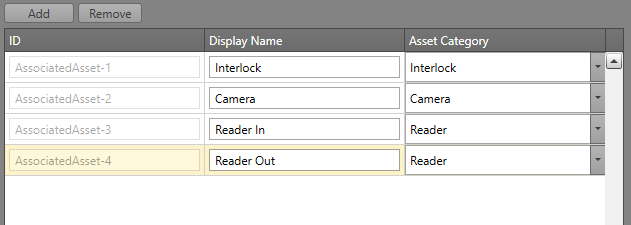 Note: Categories will only appear for asset types which exist in your project. So, for example, if you do not have any integrated systems which use readers, the reader type will not appear.
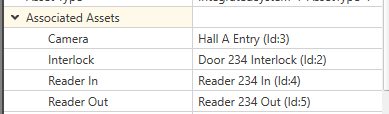
Assign Asset Associations to a Custom Asset
Once you have created the association types, you can begin associating your custom assets of that type with assets from other integrated systems.
Before completing these steps, all of the assets you wish to include in the association must be added to the project first.
To associate assets to your custom asset:
-
For each association type, select an asset.
 Note: These associations can also be assigned via Import/Export on the asset type:
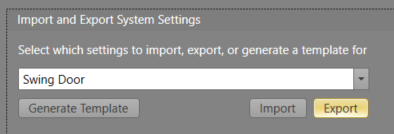
Update or Delete an Associated Asset
It is also possible to modify or remove an Associated Asset from the project.
After completing the steps outline in the Add Associations to the Asset Type section, it is now possible to either edit the asset's Display Name and Asset Category, or remove it completely from the project.
Using Associated Assets in Workflows
Associated Assets can help simplify a Workflow in the project.
After completing the steps outlined in the Add Associations to the Asset Type and Assign Asset Associations to a Custom Asset section, it is now possible to access triggers, properties, and commands of the associated assets in a Workflow.
For the Start block:
-
To find Associated Assets in the
Start block, go to the Trigger
Browser.
- Under Integrated Systems go to PLC Devices → Assets→ Asset's Name → Asset's ID. There will be a list of associated asset commands under Events according to the type of integrated system being associated with the PLC device.
 Note: This list will have all the possible triggers available for that asset's category. So, if the association is a camera type, it will display camera event options consolidated from all camera integrated systems in the project.Note: If you select an Associated Asset as the trigger, the Triggering Item will still remain with the parent asset. If the trigger mentioned above was chosen as (Associated Asset - Camera 1): Selected, the resulting Triggering Item will be the Swing Door that has the association.
For the Logic block:
-
To find Associated Assets in the
Logic block, go to the Logic
Editor.
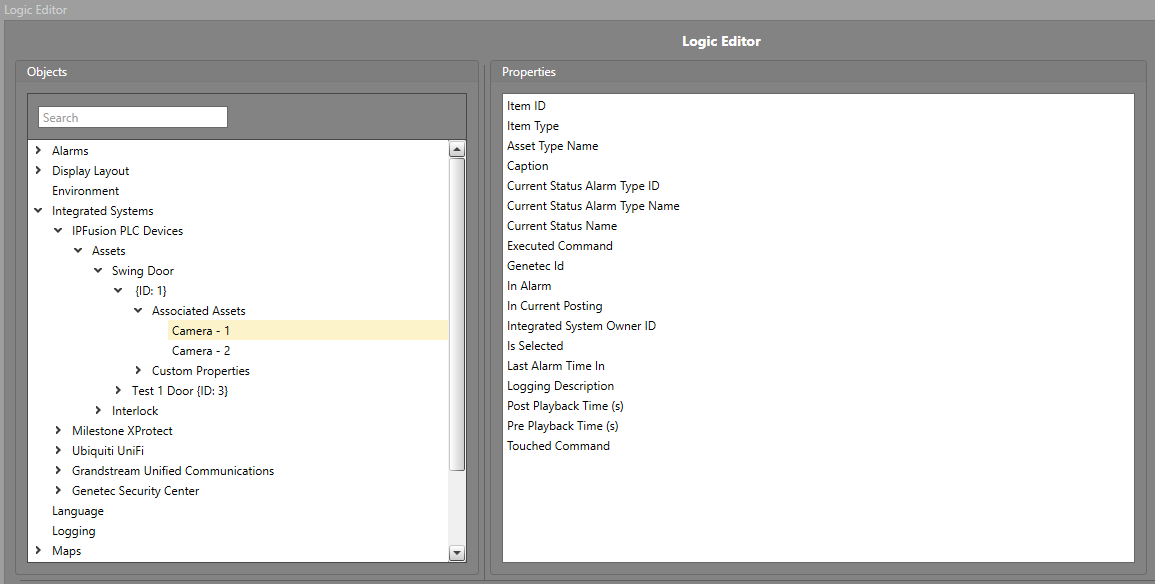
- Under Integrated Systems go to PLC Devices → Assets→ Asset's Name → Asset's ID → Associated Assets. Choose the required integrated system asset and select from the list of commands available under Properties.
For the Action block:
-
To find Associated Assets in the
Action block, go to the Action
Browser.
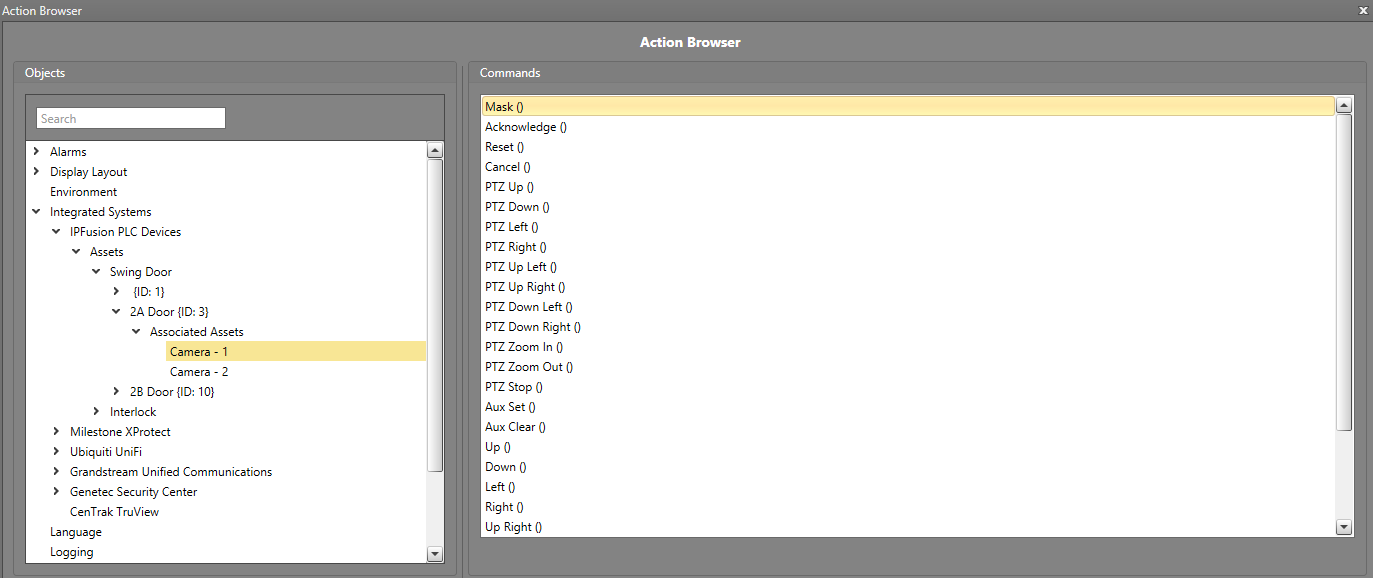
- Under Integrated Systems go to PLC Devices → Assets→ Asset's Name → Asset's ID → Associated Assets. Choose the required integrated system asset and select from the list of commands available under Properties.
Associated Assets Example
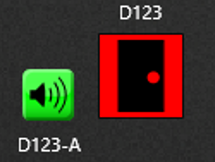
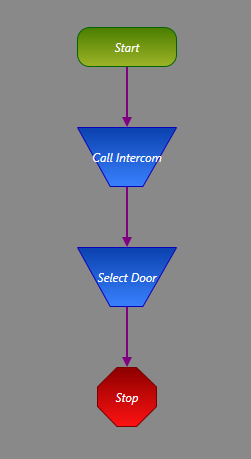
This example will demonstrate how to use Associated Assets to automatically initiate and end a call on an associated intercom when a door is selected or deselected.
- IPFusion PLC Devices Swing Door
- Harding DXL Intercom
By default, these assets do not have any meaningful connection to one another. Through using Associated Assets in two Workflows, we can associate PLC Devices assets with other types of assets in a project, such as an intercom. In this example, the first Workflow will automatically call the intercom and select the door when the intercom is touched. The second Workflow, will end the call when the door is deselected. This will improve the user experience by associating the door with the intercom to reduce the number of actions taken by the user.
-
Add the Asset Association to the Asset
Type for the intercom.

-
Assign the intercom asset's Display Name in the
Swing Door's Associated Asset field in the Property Grid.

-
Add a new Workflow and label it Call
intercom and Select Door on Intercom Touched.
- Add a Trigger by double-clicking on the Start block.
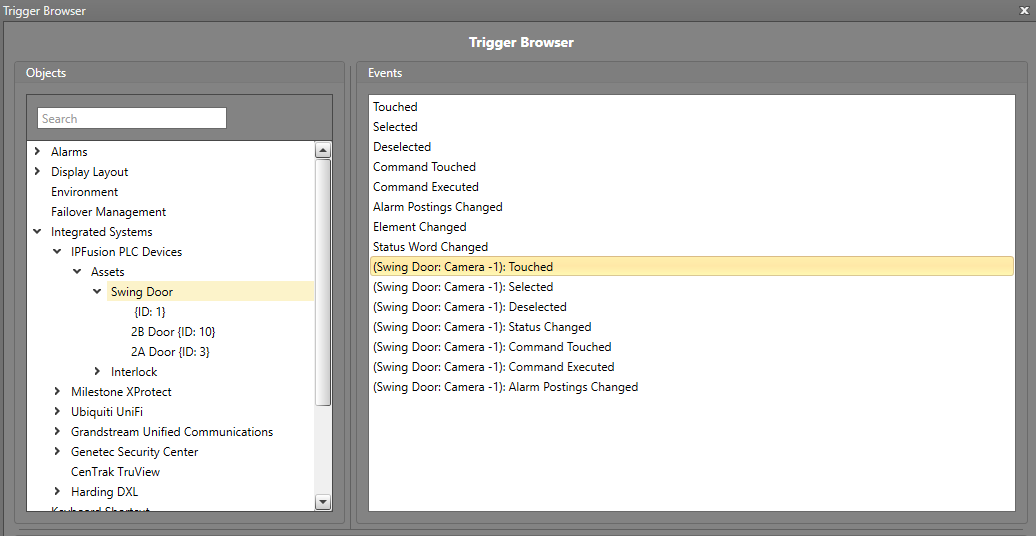
- In the Trigger Browser go to Integrated Systems → IPFusion PLC Devices → Assets and find the Swing Door asset. Select the (Associated Asset - IntercomA): Touched event and click OK.
- Add an Action block to send a Call command to the Swing Door's associated intercom.
- In the Action Browser, go to Integrated Systems → Harding DXL. Select the Execute Asset Command (Command, Selected Asset IDs) command.
- Click on Command and select the
Call | (Default Intercom
Commands).
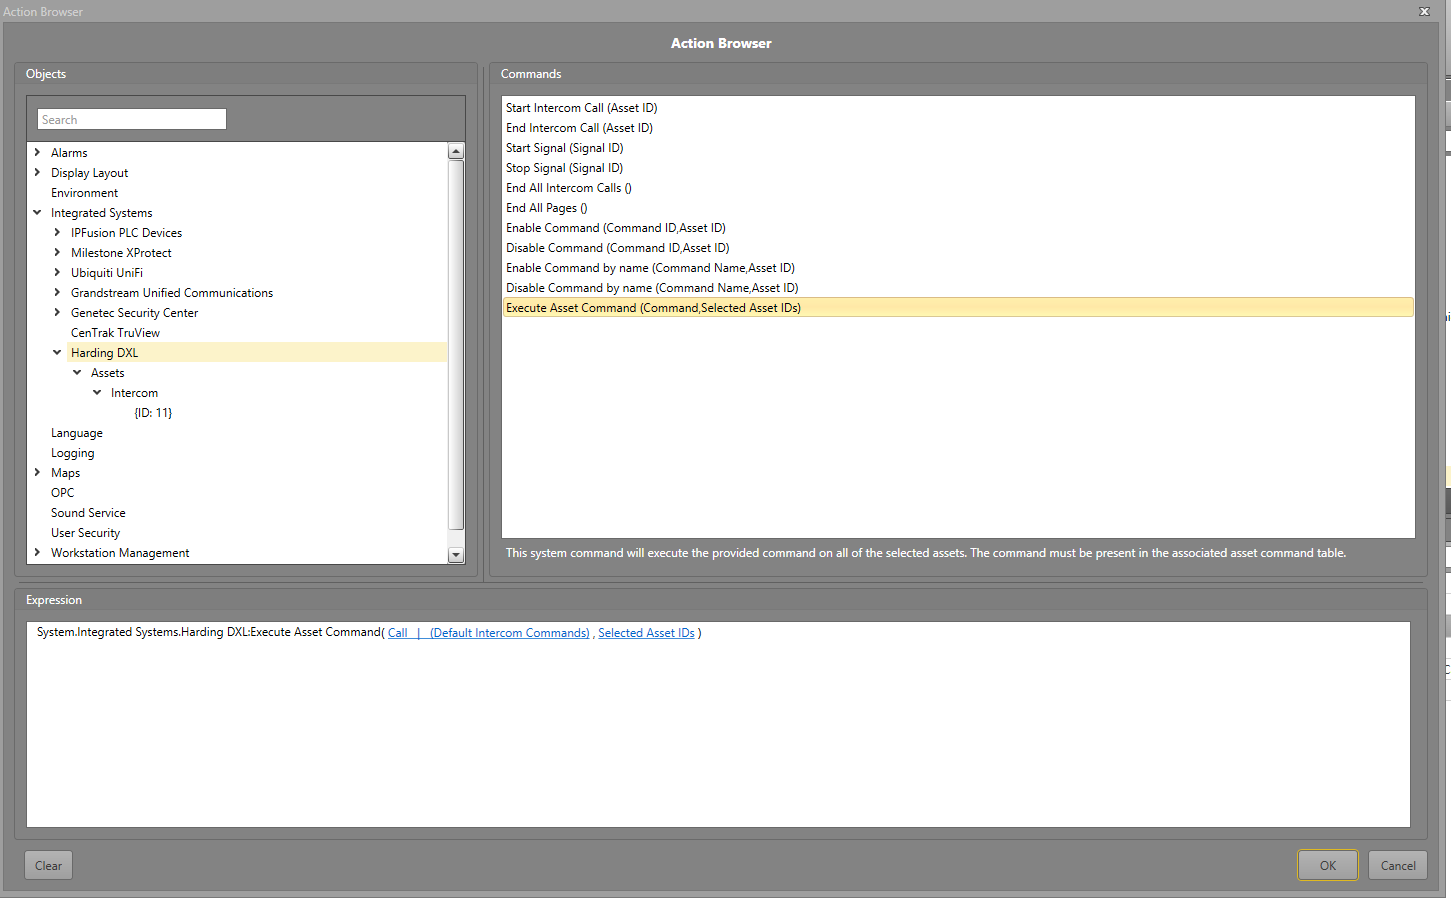
- Click on Selected Asset IDs to bring forth the Object Browser. Go to Advanced.
- Select Triggering Item → Initial → Associated Assets → (Swing Door): IntercomA and click on Item ID. Click OK.
- Add one more Action block after the Call Intercom Action block.
- In the Action Browser go to the Display Layout → Select Assets (Assets). Click on Assets in the Expression pane. Click Advanced to get to the Object Browser.
- Select Triggering Item →
Initial → Associated
Assets → (Swing Door):
IntercomA and click on Item
ID. Click OK.
-
Add a new Workflow and label it End Call
on intercom when Door is Deselected.
- Add a Trigger by double-clicking on the Start block.
- In the Trigger Browser go to Integrated Systems → IPFusion PLC Devices → Assets and find the Swing Door asset. Select the (Associated Asset - IntercomA): Deselected event and click OK.
- Add an Action block to send an End Call command to the Swing Door's associated intercom.
- In the Action Browser, go to Integrated Systems → Harding DXL. Select the Execute Asset Command (Command, Selected Asset IDs) command.
- Click on Command and select the End Call | (Default Intercom Commands).
- Click on Selected Asset IDs to bring forth the Object Browser. Go to Advanced.
- Select Triggering Item →
Initial → Associated
Assets → (Swing Door):
IntercomA and click on Item
ID. Click OK.

- A call is requested from the intercom.
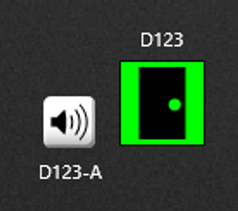
- The user touches the intercom.
- The intercom is called, and the door is selected.
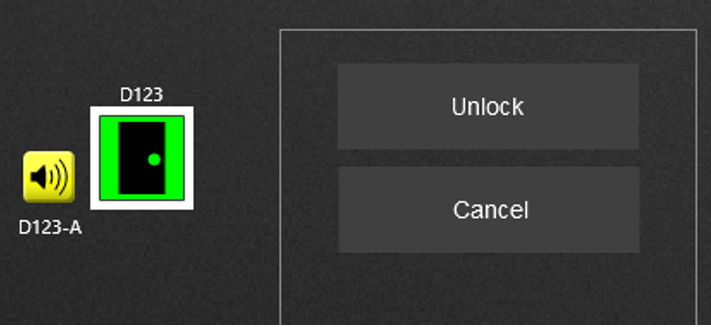
- The user unlocks the door, which automatically deselects the door and ends
the intercom call.