Message Banner

Using the Message Banner, you can create a customized viewer within a Display Layout. Using Workflows, you can add custom content to this banner.

The Message Banner is useful for showing custom information. For example, you may want the operator to see messages for when someone opens a door. The information displayed could include the date, time, and information about who opened the door.

  1. In Project Explorer > Display Layouts, click the Display Layout to add the Message Banner to.
  2. Drag and drop the Message Banner item from the Toolbox to the desired location.
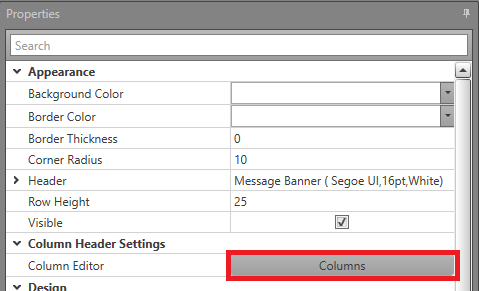
  3. In the Properties, click the Columns button to open the Column Editor.
  4. Drag the lines between columns to change their size. Drag and drop column headers to or from the Available Columns to change what columns are displayed in Runtime. These Value columns allow you to set custom content for them within a Workflow.
  5. You can customize your columns by selecting them, and editing their properties listed below:
    Table 1. Column Header Settings
    Background The Background color of the header.
    Font Settings — Font Name The Name of the Font used in the column header.
    Font Settings — Font Size The Size of the header text.
    Font Settings — Is Bold Check this to Bold the header text.
    Font Settings — Is Italic Check this to italicize the header text.
    Font Settings — Line Spacing The spacing between lines of text in the header.
    Font Settings — Strikethrough Check this to add a Strikethrough to the header text.
    Font Settings — Text Alignment The Alignment of the column header text.
    Font Settings — Text Color The Color of the column header text.
    Font Settings — Underlined Check this to underline the column header text.
    Title The text for the column header.
    Width The Width of the column in pixels.
    Row Background Color The Background Color displayed on the rows.
    Minimum Row Height The smallest height the rows can have. If the font size of the row text requires more space, the row will automatically resize to fit the text.
    Table 2. Row Font
    Font Name The Font used for the rows.
    Font Color The Color used for the row text.
    Font Size The Size of the text in the rows.
    Is Bold Check this to Bold the row text.
    Is Italic Check this to italicize the row text.
    Table 3. Runtime Settings
    Allow Runtime Filtering Check this to allow filtering on this column in Runtime.
    Allow Runtime Sorting Check this to allow sorting on this column in Runtime.
    Note: If conditional formatting is used, the above settings will be overridden.
  6. Click OK.

Adding Content to the Message Banner

To have the Message banner display messages in Runtime, they must be added in a Workflow. The Action block can be used to create the message.

  1. In Project Explorer > Workflows, double-click the Workflow to edit, or Add a new one.
  2. Drag and drop an Action block into the work area, and connect it to the blocks to run before and after it.
  3. Double-click the Action block to open the Action Browser.
  4. Go to Display Layouts > Display Layout and expand the layout the Message Banner is on. Click the Message Banner.
  5. In the Commands pane, click Add Text Message (Value1,Value2,Value3,Value4,Value5).
  6. In the Expression pane, you can click the blue text for the Value columns added to the Message Banner.

    To add information for an Object's Property, click the Advanced button when adding a value.

    Important: If the Value you provided content for was not added as a column to the Message Banner, it will not be displayed.
  7. Click OK.
  8. To apply conditional formatting to the rows, select Format in the Properties grid to open the Conditional Formatting Rules Manager.