
Add and Edit a Group
Create Groups within your project to manage user access in both Designer and Runtime. Security must be enabled to create groups.
Add a Group
You can create a group to assign it to user accounts.
-
It is possible to edit the following sections:
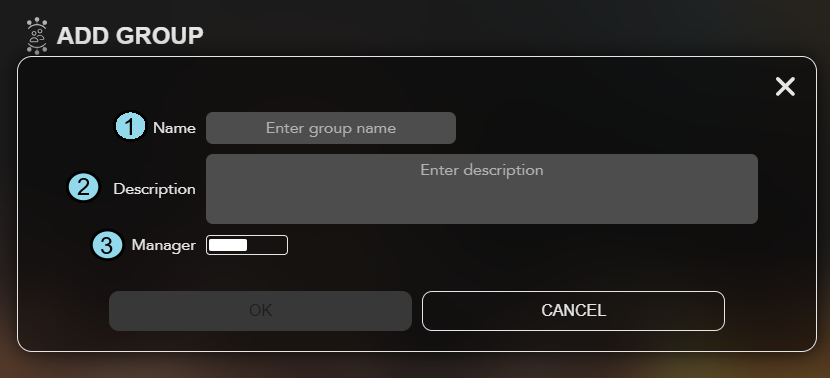
Name Description Editable after Group Creation 1. Name The Name of the group. No 2. Description The Description of the account. Yes 3. Manager Indicates whether or not this Group has manager privileges. Groups with manager privileges allow their users to log in to the Access and Identity Management Client and manage the Users, Groups, and Admin Dashboards. Yes
Edit a Group
After creating a group, it is now possible to edit the profile.
-
Fill in the information for the new Group.
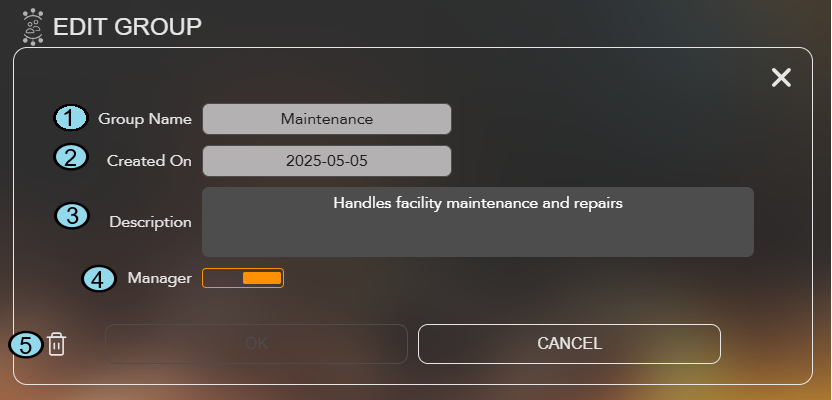
Name Description Editable after Group Creation 1. Group Name The Name of the group. Note: A few requirements to keep in mind when creating groups:- Group names must be unique
- Group names are not case sensitive
No 2. Created On The date the group was created. No 3. Description The Description of the group. Yes 4. Manager Toggle this option to enable or disable manager privileges for the group. Yes 5. Delete Click on the garbage icon to delete the profile. N/A