Advanced Navigation Layout Examples
Below are examples of a simple and complex navigation layout. These show the different ways you can configure your navigation schemes for Workstations.
Simple Example
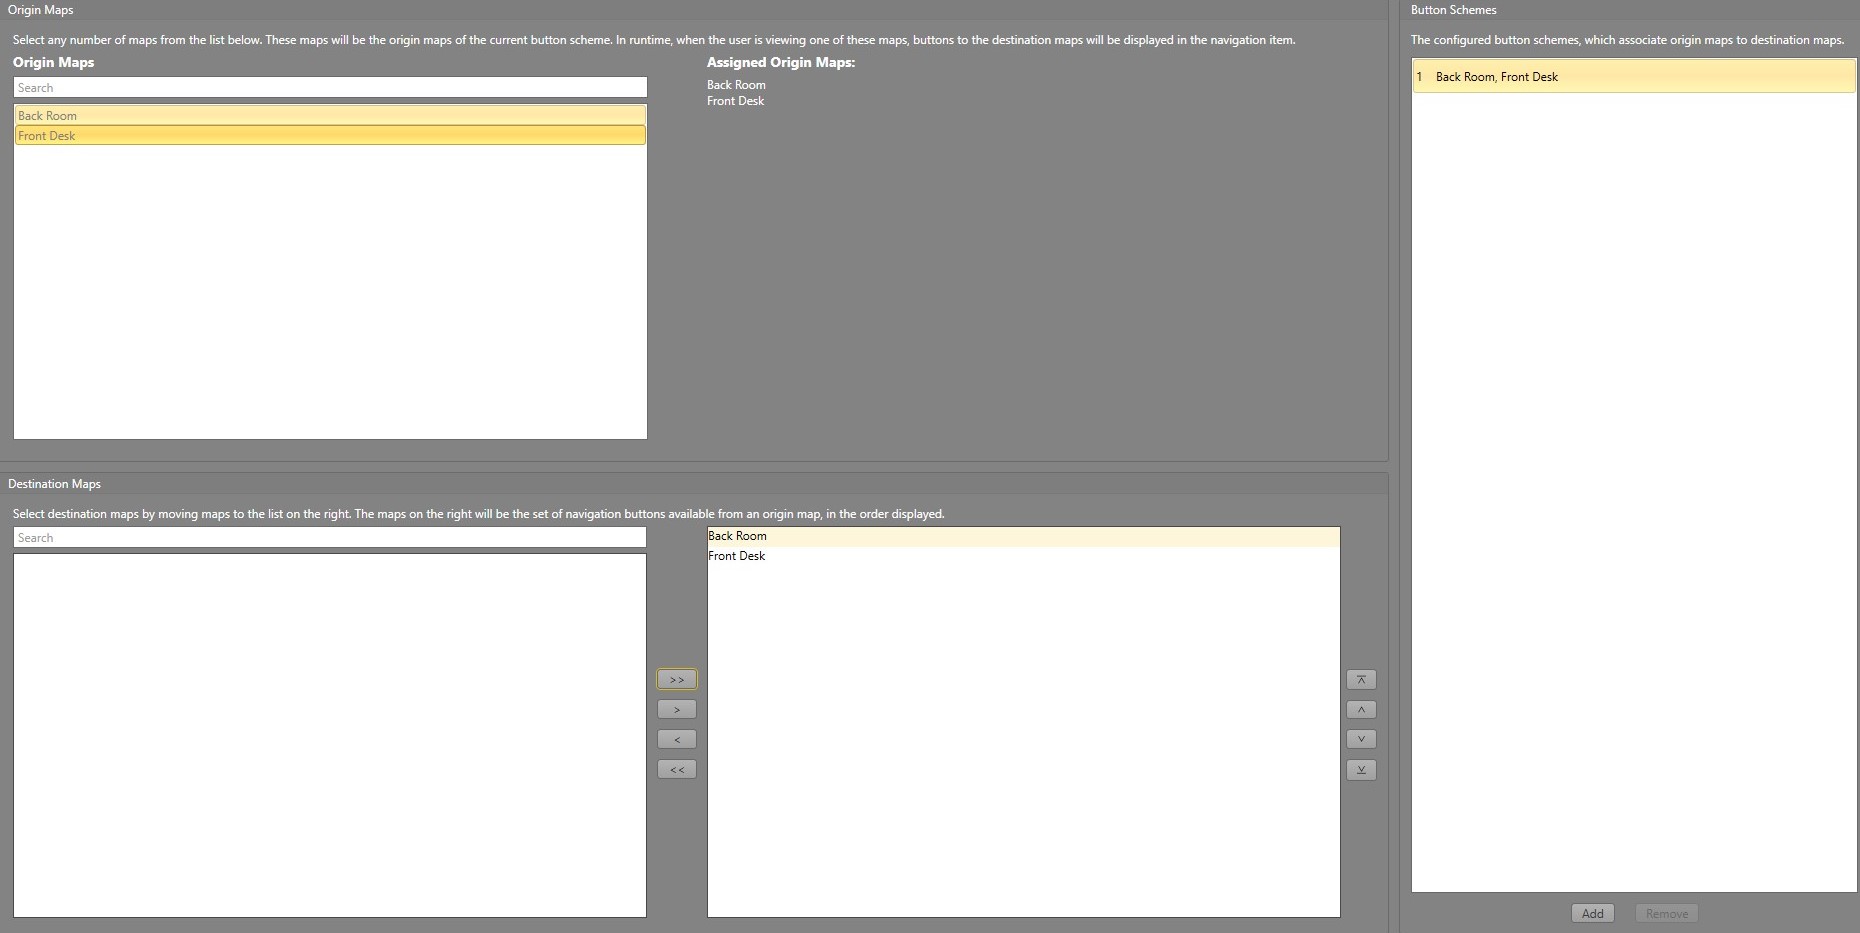
In this example, we will have a single building with a couple areas, and two Workstations. There is a front desk and back room. We will make the front desk Map available to both Workstations. However, the back room Map will only be available from one Workstation located in the back.
-
Select both the back room and front desk as Origin Maps
and Destination Maps. Runtime will show buttons for both
Maps when navigating between them.
Complex Example
In this example, we will have a large site with multiple buildings, floors on each building, and multiple Workstations. We want the operator to be able to navigate between buildings and floors on site, while not having to view all possible navigation options at once. We can simplify the navigation process.
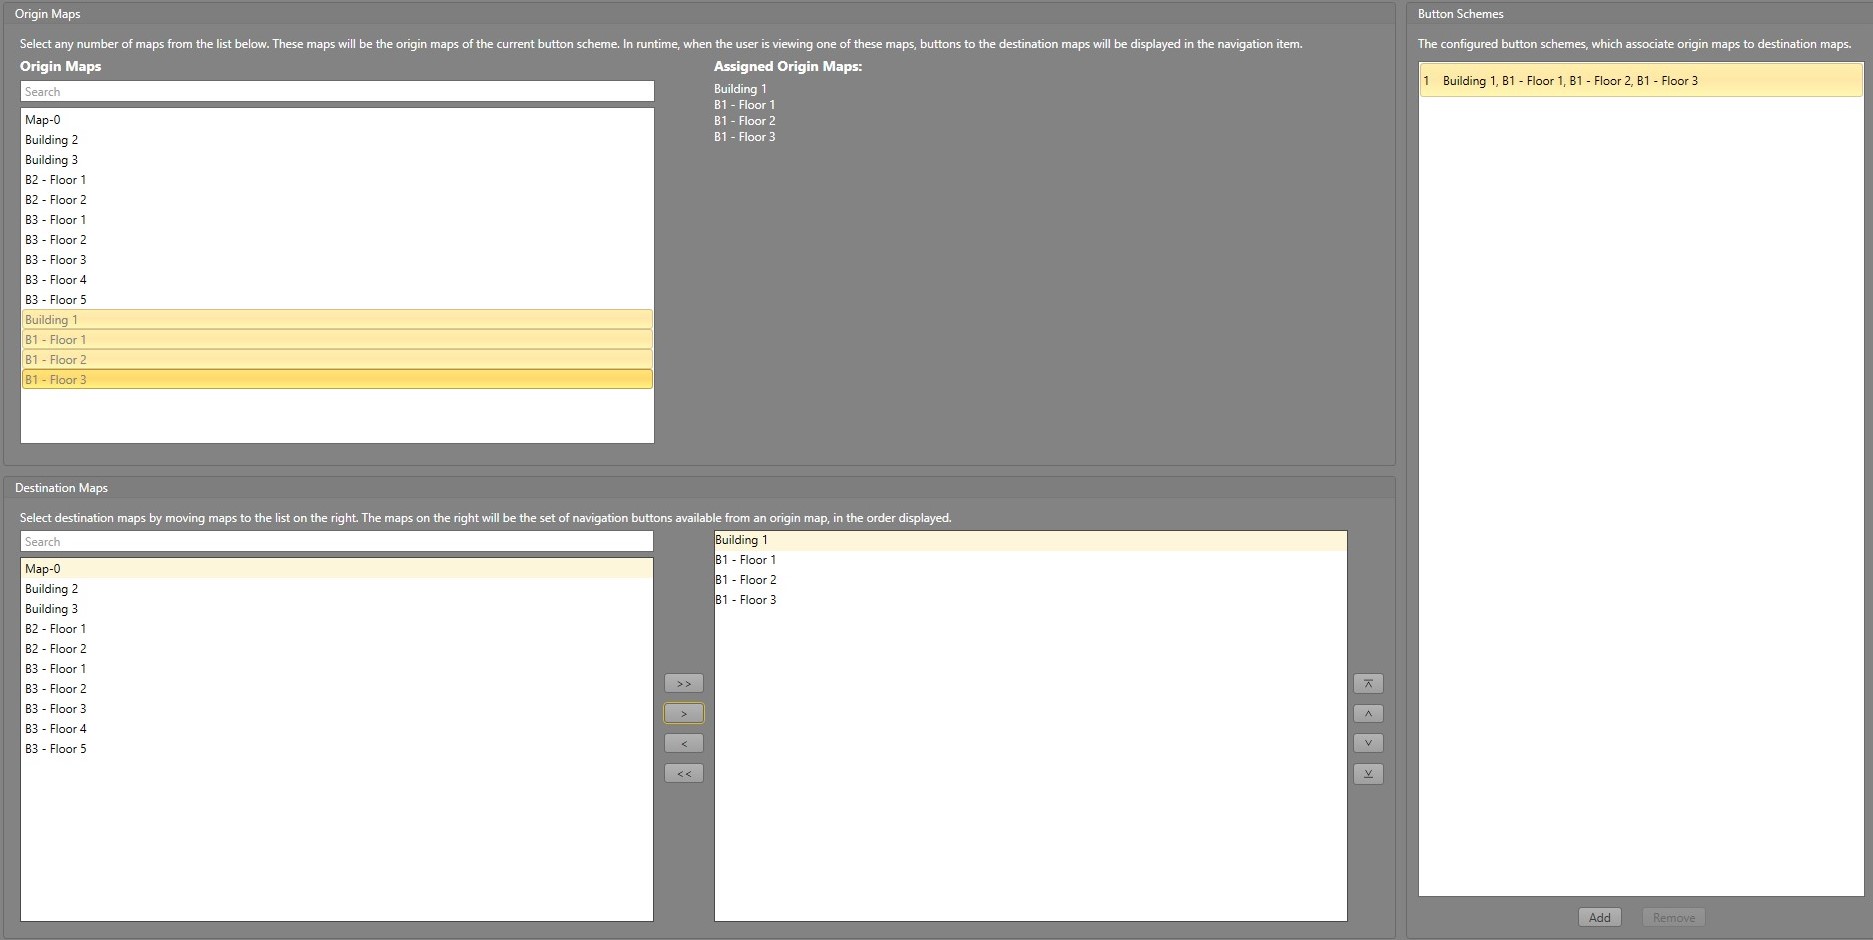
View One Building
First, we will configure a set of Workstations to only be able to see their building.
-
We can set the building and its floors as the Origin
Maps and the Destination Maps.
This will have Runtime display buttons for each floor.
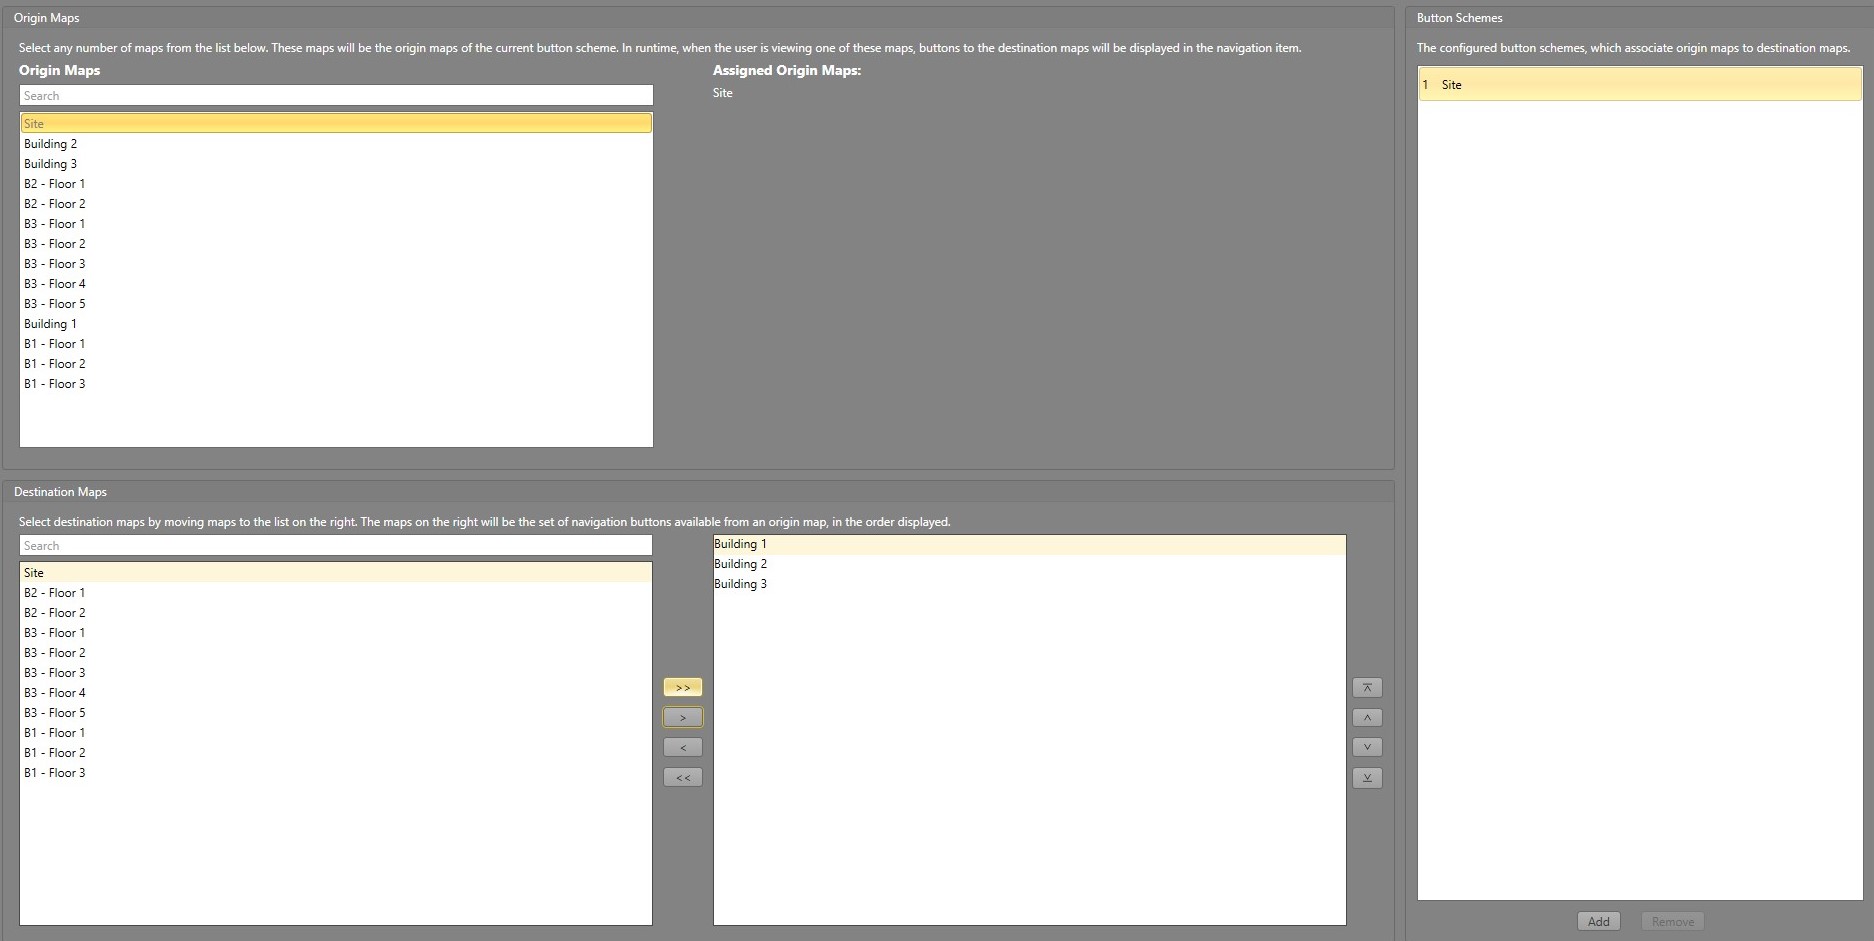
View All Buildings
-
For the first Button Scheme, we will select our
Site Map as the
Origin. The Destination
Maps will be set to the buildings. This will make
Runtime display buttons for each building when viewing the site
Map.
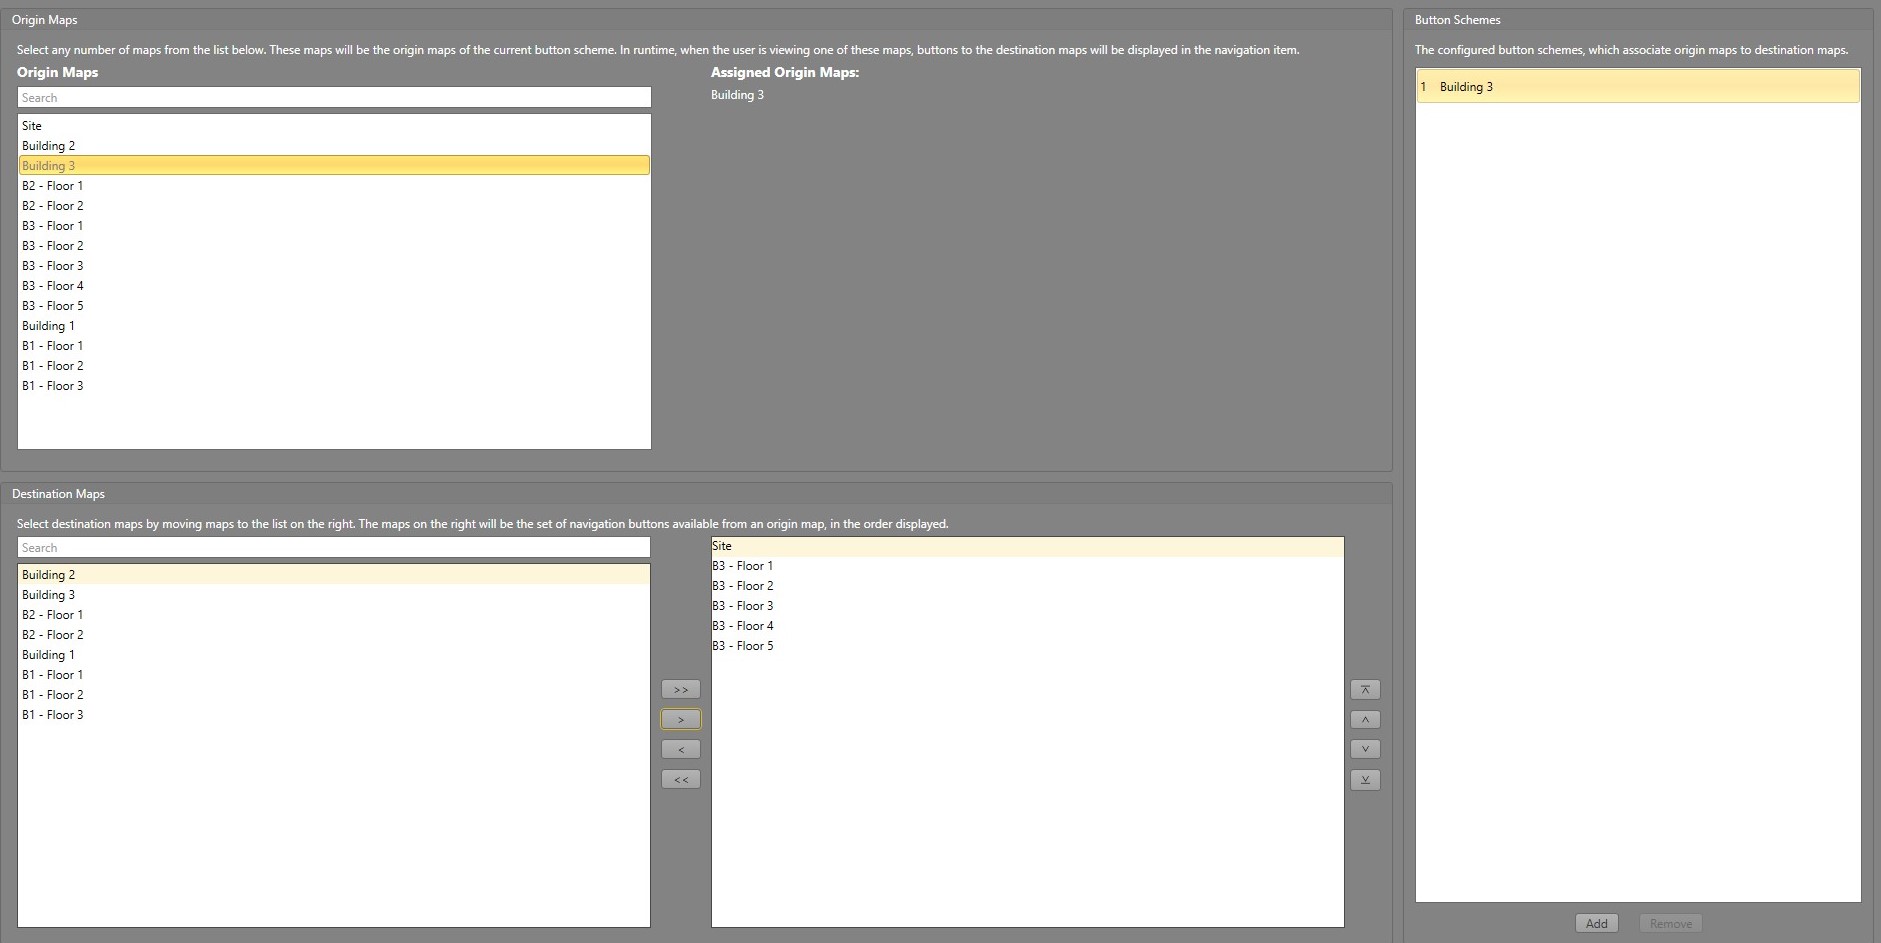
-
For each building, we will create a new Button
Scheme by clicking Add. The
building will be set as the origin map. The Site
and each floor for that building will be added as destination
Maps. Runtime will show buttons for each
floor and to go back to the site view when looking at a building's
Map.
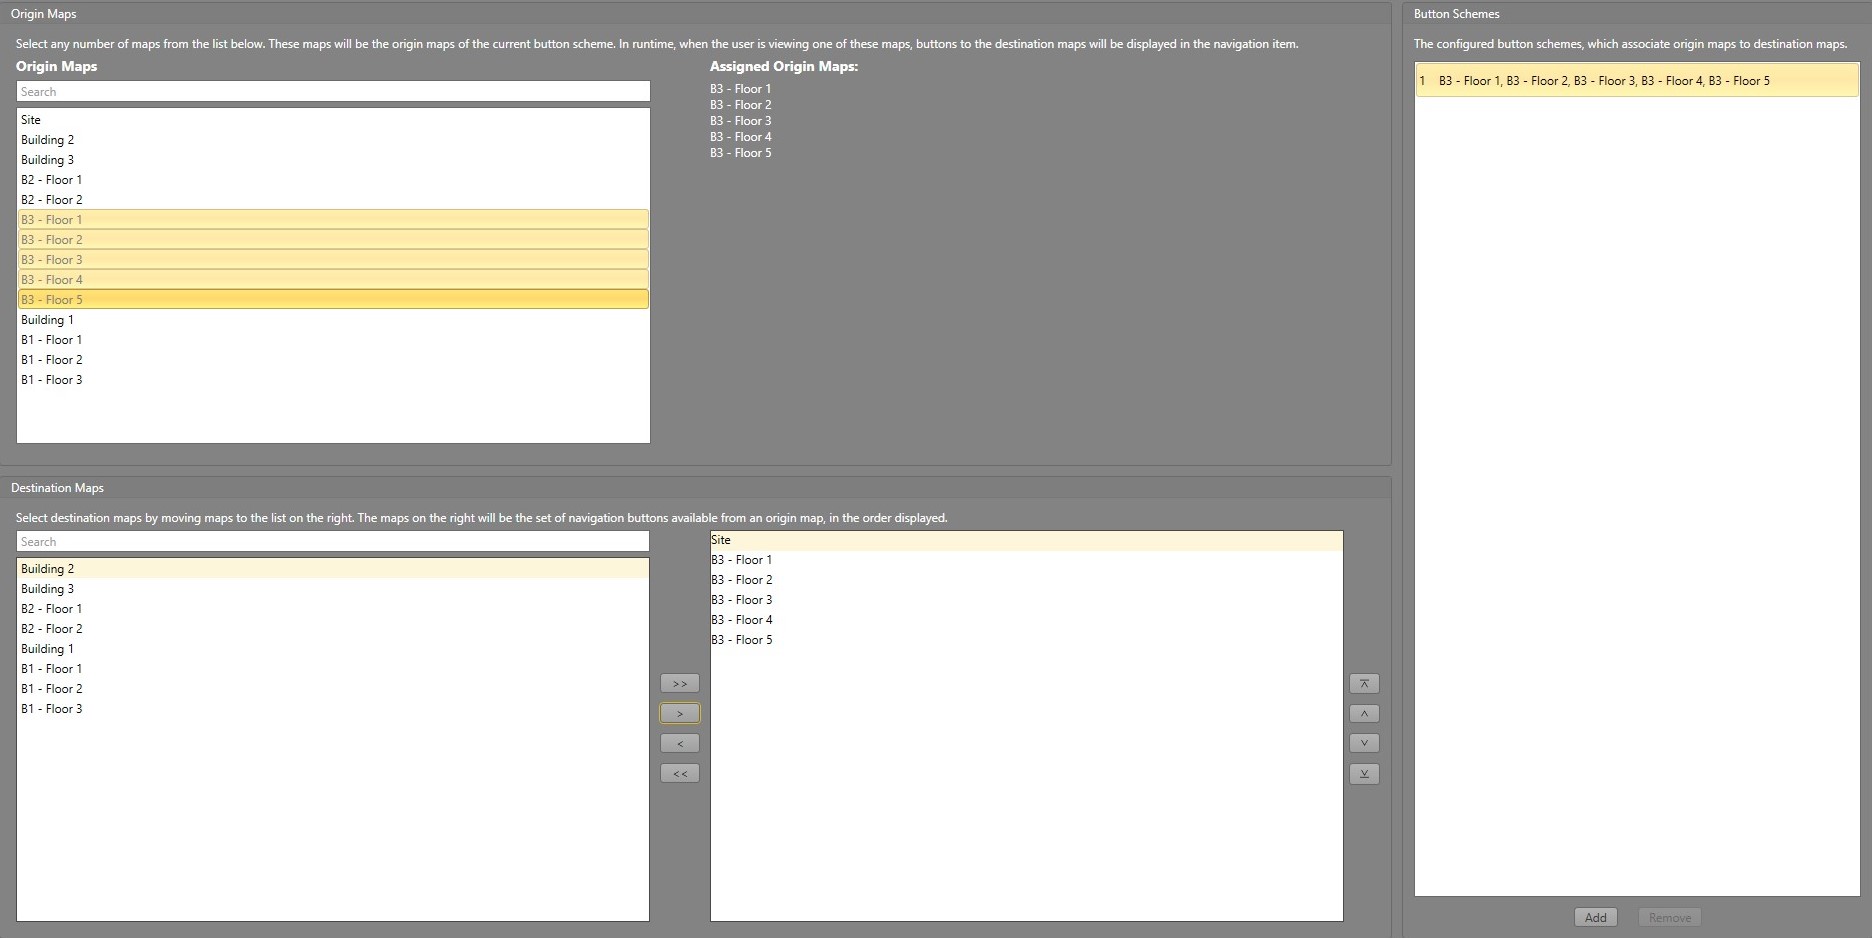
-
For each building's floors, add all floors as the Origin
Maps. Then, set the site and floors as
Destination Maps. This will make Runtime
display buttons for the floors in the building, as well as the option to
go back to viewing the site when looking at a floor's
Map.